Successfully crossing the Brèche de Roland hinges on recognizing that generic mountain advice is insufficient. The Pyrenees present unique dangers, from treacherous wet limestone to sudden, violent storms and territorial guard dogs. This guide provides a safety-first framework focused specifically on mastering these local challenges, ensuring your adrenaline-packed trip is memorable for the right reasons.
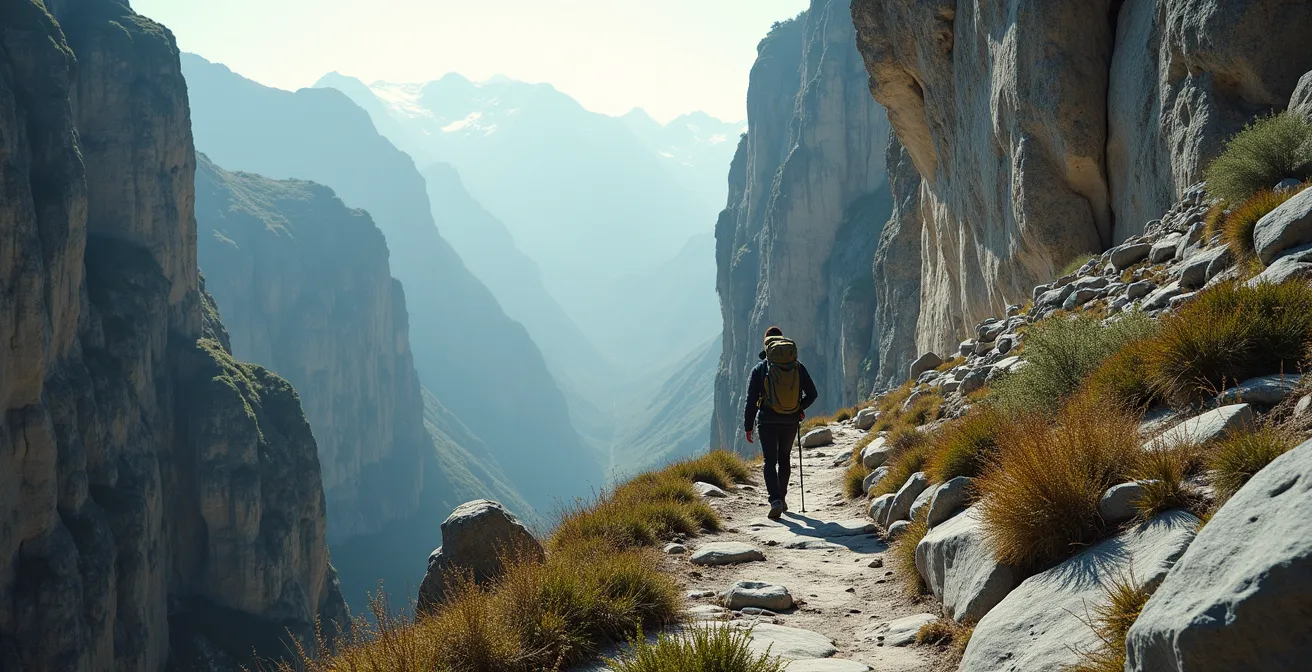
The sight of the Brèche de Roland—a massive, mythic gap sliced into the Pyrenean ridgeline—is a powerful draw for any hiker with a taste for the spectacular. This iconic route, straddling France and Spain, promises breathtaking views and a profound sense of accomplishment. Many intermediate hikers, confident in their stamina and basic skills, add it to their bucket list. However, they often rely on general alpine experience, assuming that what works in the Alps will suffice here. This is a critical, and potentially dangerous, miscalculation.
The standard advice to “pack layers” and “watch your footing” is not wrong, but it is dangerously incomplete for this environment. The true challenge of the Brèche de Roland lies not in the distance or the ascent, but in the specific, often counter-intuitive, nature of the Pyrenean landscape. The rock here is not the grippy granite of the Alps, the weather doesn’t follow predictable patterns, and the wildlife includes highly effective livestock guardians that demand a specific code of conduct. Simply put, treating this hike like any other can lead to serious trouble.
The key to a safe and successful traverse is to move beyond generic preparation and adopt a specialized mindset. It’s about understanding *why* Pyrenean limestone becomes slick as ice when wet, *how* to pack for a storm that can materialize in 15 minutes, and *what* specific protocol to follow when encountering a Patou guard dog. This guide is built on that principle: providing the technical, safety-first knowledge needed to navigate the unique environmental hazards of this magnificent route.
This comprehensive guide details the specific knowledge you need to tackle this iconic Pyrenean challenge safely. We’ll explore the unique characteristics of the terrain, the unpredictable weather, route choices, and essential safety protocols, providing you with a complete framework for your adventure.
Summary: Navigating the Specific Dangers of the Brèche de Roland Hike
- Why Is Pyrenean Limestone More Treacherous Than Alpine Granite?
- How to Pack for the Pyrenees Where Storms Hit in 15 Minutes?
- GR10 or HRP: Which Trans-Pyrenean Route Matches Your Endurance Level?
- The Interaction Mistake That Provokes Patou Guard Dogs on Trails
- When to Attempt the Highest Passes to Avoid Residual Snow?
- How to Pack for a Multi-Day Hike Where Refuges Are the Only Option?
- The Navigation Error That Makes Glacier Crossings Deadly for Amateurs
- How to Plan an Adrenaline-Packed Trip Without Damaging Fragile Ecosystems?
Why Is Pyrenean Limestone More Treacherous Than Alpine Granite?
The primary geological difference between the Pyrenees and the Alps dictates a fundamental shift in hiking technique. Much of the high Pyrenees, including the approach to the Brèche, is composed of karst limestone. While beautiful, this rock has a treacherous quality: its friction coefficient drops dramatically when wet. Unlike granite, which often retains a gritty texture, polished limestone becomes notoriously slick. Independent research from 2016 demonstrates that moisture significantly reduces the rock’s grip, turning a simple traverse into a high-risk activity.
This requires hikers to adapt their footwork. On smooth, sloping limestone slabs, you must master the ‘smearing’ technique—using the entire sole of your boot to maximize surface contact and friction, rather than relying on edges. Conversely, on sharp ‘lapiaz’ formations, where the rock has been eroded into blade-like ridges, precise ‘edging’ is necessary. Using walking poles is non-negotiable; they provide crucial stability during ascents and descents on loose scree and slippery rock.
A specific challenge on this route is the waterfall crossing below the Sarradets refuge. While it may look intimidating, the rock here is less polished and offers surprisingly good grip. The real danger lies on the permanent, steep snowfields, or névés, higher up. Here, a simple slip on the icy surface can be fatal, making proper equipment and technique paramount.
How to Pack for the Pyrenees Where Storms Hit in 15 Minutes?
Pyrenean weather is infamous for its volatility. Due to its proximity to the Atlantic and Mediterranean, conditions can shift from clear skies to a full-blown, violent thunderstorm in as little as 15 minutes. This is not an exaggeration. This rapid change means your storm gear cannot be buried at the bottom of your pack; it must be instantly accessible. Your packing strategy should be built around a 30-second storm drill: the ability to get fully waterproofed without delay.
This means your waterproof jacket and pack cover should be in a top compartment or an external side pocket, not in your main compartment. Practice putting on your jacket and cover without taking your pack off. Your most critical emergency items, like an emergency bivy or survival blanket, should be in a waist belt pocket for immediate deployment in a worst-case scenario. Similarly, keep high-energy bars and hand warmers in chest strap pockets for easy access when stopping is not an option.
Even in high summer, be prepared for snow and a dramatic drop in temperature. Using brightly colored stuff sacks for your essential storm gear can make a life-saving difference in low visibility, helping you locate critical items quickly. Forget aesthetics; think function and speed. Your ability to react instantly to a sudden storm is one of the most important safety skills in the Pyrenees.
GR10 or HRP: Which Trans-Pyrenean Route Matches Your Endurance Level?
For those looking to extend their Pyrenean adventure beyond a single iconic pass, choosing the right long-distance trail is crucial. The two main options, the GR10 and the Haute Randonnée Pyrénéenne (HRP), offer vastly different experiences tailored to different endurance and skill levels. The GR10 is a well-defined trail, while the HRP is more of a high-altitude concept that demands significant autonomy.
The following comparison, based on data from an analysis by the specialist publisher Cicerone, highlights the key differences:
| Trail Aspect | GR10 (French) | HRP (High Route) |
|---|---|---|
| Total Distance | 866 km | ~800 km |
| Elevation Profile | More climb as it drops into deep valleys | Stays higher overall |
| Trail Marking | Well-marked red/white | No markers except rare exceptions |
| Resupply Frequency | Regular village access | Up to 3-4 days between supply points possible |
| Technical Difficulty | Moderate hiking | 20% off-trail requiring route finding |
| Average Completion Time | 45 days | 40-45 days |
The GR10, while physically demanding due to its constant ascents and descents into valleys, is a logisticaly simpler choice. It’s well-marked and passes through villages regularly, making resupply straightforward. The HRP, in contrast, stays as close to the high ridge as possible. It is largely unmarked and requires advanced navigation and route-finding skills. An experienced hiker notes, “I’ve now walked the HRP and the GR11 four times each and generally taken a little under 40 days… and about 45 days on my two hikes of the GR10.” Your choice depends on whether you seek a challenging but supported trek (GR10) or a true wilderness and navigational test (HRP).
The Interaction Mistake That Provokes Patou Guard Dogs on Trails
One of the most unique and potentially intimidating encounters in the Pyrenees is with the Pyrenean Mountain Dog, or ‘Patou’. These are not pets. They are livestock guardian dogs, bred for centuries to protect flocks from predators. Their presence has been incredibly effective, with some studies reporting a 90% reduction in livestock losses for shepherds who use them. Understanding their role is the first step to a safe interaction: their job is to place themselves between their flock and any perceived threat, including hikers.
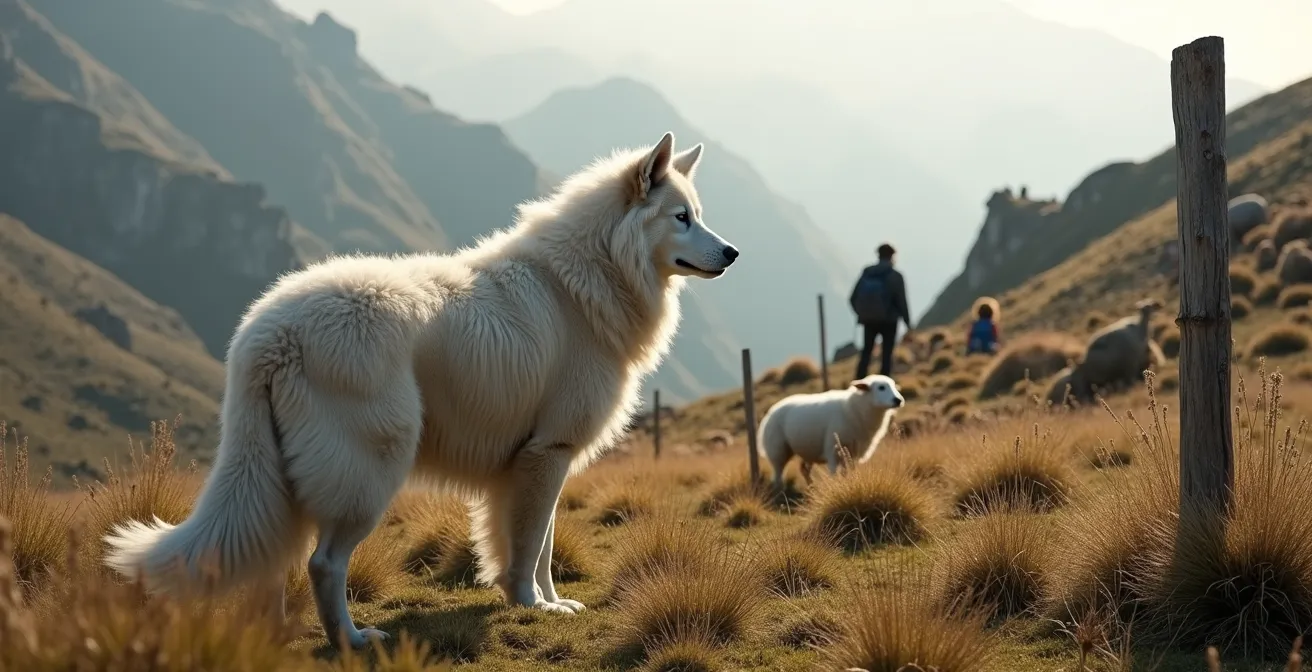
The most common mistake hikers make is to treat a Patou like a domestic dog—trying to be friendly, making eye contact, or walking directly towards it. This behavior is interpreted as a challenge. The correct response is a calm, de-escalation protocol. If a Patou approaches you barking, you must:
- Stop immediately. Stand still and keep your arms down by your side. Do not raise your walking poles.
- Speak calmly to the dog in a low, soothing voice. This identifies you as a human and not a predator.
- Avoid direct eye contact and turn your body sideways to appear less threatening.
- Back away slowly once the dog calms down. If it barks again, stop. The goal is to give the flock a very wide berth, even if it means a significant detour. Never, ever try to cross through a herd of sheep.
Patience is key. You are on the dog’s territory. By showing respect for its role and its space, you can turn a potentially dangerous encounter into a moment of mutual, distant respect.
When to Attempt the Highest Passes to Avoid Residual Snow?
Timing your attempt on the Brèche de Roland is critical, and the primary factor is snow. The high passes of the Pyrenees hold snow much later into the year than many hikers anticipate. Attempting the route too early in the season means facing steep, icy, and potentially lethal snowfields (névés) without the proper skills or equipment. It’s a common mistake that turns a challenging hike into a mountaineering expedition.
As the “Best world walks guide” from Walkopedia authoritatively states, timing is everything. They provide a clear guideline for hikers planning their trip:
Snow lies late, with the high range, including the Breche only really clear by mid July.
– Walkopedia, Best world walks guide
The ideal window for most intermediate hikers is from late July to mid-September. Before this, you must be prepared for significant snow crossings requiring crampons, an ice axe, and the knowledge to use them (including self-arrest techniques). Even late in the season, residual snow can be a serious hazard. A hiker’s account from a September trip highlights the danger:
Case Study: Late Season Snow Danger
On a September attempt, a group of hikers encountered a steep snow slope just below the Brèche. They observed, “Everyone on it had ice axes or ski poles. Everyone was having quite a bit of trouble on the slope. We saw a couple of people fall. We didn’t think it was a good idea to try without any snow climbing gear.” They wisely turned back. This illustrates that even in late summer, conditions can demand technical snow equipment. Always check recent local conditions before your ascent.
The takeaway is clear: do not underestimate the Pyrenean snow. Unless you are an experienced mountaineer, plan your trip for the high summer to maximize your chances of a clear and safer passage.
How to Pack for a Multi-Day Hike Where Refuges Are the Only Option?
Embarking on a multi-day trek in the Pyrenees, like the HRP or sections of the GR10, often means relying on the network of mountain refuges. This completely changes your packing strategy, allowing for a significantly lighter and more agile approach. The key is understanding what refuges provide and what they don’t. The Pyrenean refuge network is varied, including manned refuges (like hotels in the sky), unmanned “bothy” style huts, and ‘gîtes d’étape’ in valleys. Manned refuges offer beds, blankets, and often excellent meals and drinks, making them a game-changer for pack weight.
Your packing list should be an exercise in minimalism, focusing only on what is essential. An ultra-light refuge packing strategy allows you to keep your base pack weight (excluding water and food for the day) under 5kg. The core principle is to avoid redundancy. If the refuge provides it, you don’t carry it. Your focus shifts to personal items and safety gear.
An effective refuge-to-refuge pack should prioritize:
- Personal sleep system: A lightweight silk or cotton sleeping bag liner is mandatory for hygiene in all refuges.
- Essential items: A headlamp (for navigating dorms at night), personal hygiene items, and basic first aid.
- Clothing: One set for hiking and one dry, clean set for the refuge. Add a warm fleece and a waterproof layer, but avoid carrying multiple spare outfits.
- Electronics: A GPS device or phone for navigation, and a small 10,000mAh power bank to keep them charged.
What you leave behind is just as important: heavy sleeping bags, any cooking gear (stove, gas, pots), and large quantities of food are unnecessary when you’re moving between manned refuges. This lightweight approach not only saves your back but allows you to move faster and more safely over technical terrain.
The Navigation Error That Makes Glacier Crossings Deadly for Amateurs
The final approach to the Brèche de Roland involves what is commonly called the ‘Glacier de la Brèche’. It’s crucial to understand that this is not a true, crevassed glacier but a permanent, steep, and often icy névé. This distinction does not diminish its danger. As a warning on AllTrails grimly states, this is the crux of the hike.
To reach the Brèche, it is essential to cross the ‘Glacier de la Brèche’, a permanent, steep and often icy névé. This is a very dangerous passage, and a slip can be fatal.
– AllTrails, Gavarnie – Breche de Roland Trail Guide
The deadliest error here is not one of gear, but of navigation and judgment. The single most dangerous mistake is to blindly follow existing footprints in the snow. Old tracks can lead across weakened snow bridges over meltwater channels or to sections that have become dangerously icy since the tracks were made. You must assess the route for yourself. This requires crossing early in the morning when the snow is firm, not in the afternoon when it turns to slush. In flat light conditions, where it’s impossible to see the slope’s angle, use your walking poles held out in front of you to cast artificial shadows and read the terrain.
Your gear must match the conditions. For late-season attempts, microspikes might suffice. For any attempt before late July, crampons and an ice axe are mandatory, as is the knowledge of how to use them. The nearby Sarradets ladder, a cabled section of rock, also becomes extremely dangerous in wet or snowy weather, requiring you to use your hands with significant exposure. An altimeter should be used alongside your GPS to confirm your vertical position, as a small error can place you on the wrong, more dangerous, part of the slope.
Your Pre-Névé Crossing Safety Audit
- Equipment Check: Verify that every member has appropriate traction (microspikes/crampons) and poles/ice axe. Check that they are fitted correctly and accessible.
- Conditions Assessment: Evaluate the snow’s firmness. Check the weather forecast for temperature changes or incoming precipitation. Assess visibility.
- Route Plan: Visually identify your intended path across the névé and your destination. Do not just follow old tracks. Identify potential hazards and safe zones.
- Team Briefing: Communicate the plan. Ensure everyone understands the route, the spacing between hikers, and what to do in case of a slip.
- Emergency Protocol: Confirm that everyone knows the self-arrest procedure (if equipped and trained) and that first-aid and emergency communication devices are ready.
Key takeaways
- Pyrenean limestone’s low friction when wet is a primary, underestimated hazard requiring specific footwork.
- The region’s hyper-volatile weather demands an “instant access” packing system for storm gear, not a standard layered approach.
- Respect for the working role of Patou guard dogs and following a strict de-escalation protocol is essential for safety in pastoral areas.
How to Plan an Adrenaline-Packed Trip Without Damaging Fragile Ecosystems?
The thrill of hiking in the Pyrenees comes with a responsibility to protect its unique and fragile environment. The Brèche de Roland lies within the Pyrenees National Park, an area with strict regulations designed to preserve its biodiversity. Responsible hiking here goes beyond the basic ‘Leave No Trace’ principles and requires an understanding of local ecological sensitivities. For example, a key park regulation is that dogs are not allowed, even on a leash, to protect the native fauna.
The limestone karst terrain is particularly vulnerable. On this type of ground, digging catholes for human waste is often impossible. This means you must come prepared with a waste kit to pack out all human waste and toilet paper. Staying strictly on marked trails is also more critical here than in other environments; the thin soil and delicate alpine flora on limestone surfaces are easily destroyed by foot traffic, leading to irreversible erosion.
Embracing a responsible ethos can also enhance your trip. You can actively contribute to conservation by:
- Supporting local ‘Marque Esprit Parc National’ businesses: Choose accommodations and guides certified by the park for their sustainable practices.
- Becoming a citizen scientist: Use apps like iNaturalist to identify and log the unique flora and fauna you encounter, contributing valuable data to researchers.
- Protecting water sources: Avoid camping or washing within 70 meters of lakes and streams to protect endemic species like the Pyrenean brook salamander.
- Managing expectations: The popularity of the Brèche means you will encounter crowds. To minimize your impact and enjoy a more solitary experience, plan your trip for the shoulder seasons (like September) if you have the skills and equipment for potential snow.
A truly successful trip is one that leaves no trace, respects the park’s rules, and contributes positively to the preservation of this magnificent landscape for future generations to enjoy.
By understanding and preparing for these specific Pyrenean challenges—from the rock under your feet to the clouds overhead and the guardians of the flocks—you transform a potentially hazardous trip into a calculated, respectful, and deeply rewarding adventure. Your safety, and the preservation of this landscape, depend on it.